Five Star Painting of Merrillville

Texas Professional Painters

We are dedicated to providing high quality, professional work for complete customer satisfaction from start to finish. Online Painters provides exceptional painting services at an unbelievable value.
Schedule Free Estimate
Clean
We know a great paint job is precise and clean, with no mess.
On Time
We respect your time, which is why we'll complete your project on time.
On Budget
The final invoice and associated costs will match that of the initial quote provided to the customer

Thinking About Painting?


Schedule Free Estimate
Residential Services
Commercial Services

Expert Painting Services

We're a full-service interior and exterior painting company that believes in treating our customers like family.

We pride ourselves on complete professionalism. No matter the size of your property or scope of your project, we pledge to approach it in a through, meticulous fashion. We want you to come away satisfied with the results we produce; and we work hard to exceed expectations every time we approach a task. Best of all, we keep our rates reasonable without skimping on quality.

Your Life in Color


A new coat of paint can breathe new life into a property that may have been looking worn, helping to increase its value and make it feel more welcoming. Our top-rated house painters in Connecticut offer both interior and exterior painting, commercial services, drywall, retaining stone walls, and more.
888-000-0000 Schedule Free Estimate

Residential & Commercial Painting Services

Whether your project is apartments, residential, or a commercial job site, we conduct ourselves as though we live on the premises. What this means for you is that we will respect every aspect of your residence or job site. Among the ways we show respect to your property are our notice of upcoming work, keeping a low noise level, flexibility for daily start times and end of day clean up. We consistently operate at the highest level of industry standards and strives to provide excellence and great value with every project.

Professional Painting Company

Online Painters is a professional full-service painting company located in Texas that is very reliable and affordable. We bring years of experience in both interior and exterior residential and commercial projects.

We are dedicated to providing high quality, professional work for complete customer satisfaction from start to finish. We employ only professionally skilled painting experts.

Our Promise to Deliver


Professional Expertise

Our goal is to be the most valuable, prestigious and recognized painting company in all of Texas.

Superior Quality

We provide the highest quality painting service , professional preparation and application at most competitive price.

On Time

We will show up at the scheduled time and complete the project on time.

On Budget

The final invoice and associated costs will match that of the initial quote provided to the customer.

Previous Work


Our Painting Process

Schedule Free Estimate

Schedule Your Service

Detailed Prep Work

Prepare & Execute

Project Completion

Project Completed on Time and on Budget

We Use Sherwin-Williams & Behr Paints!


Sherwin Williams
By Richard Soto 15 Sep, 2020
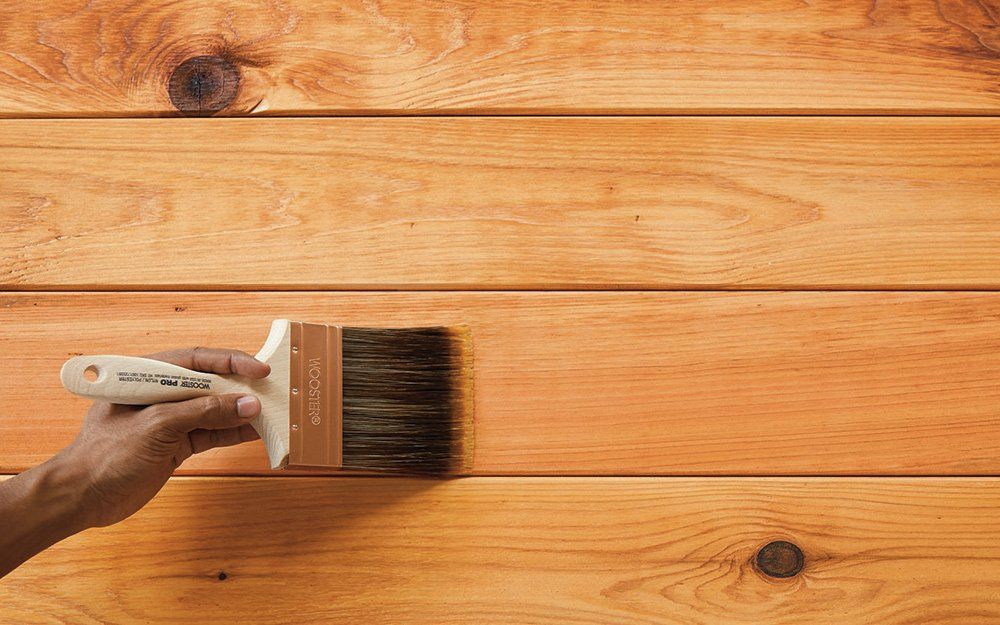
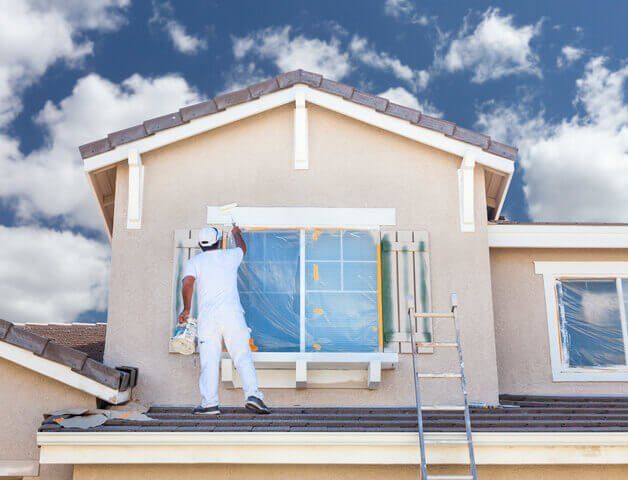
Wood that is pressure treated is an amazing option for outdoor use. As suggested by its name, it has been treated using sealants and chemicals, protecting it against harsh elements outdoor such as wind, rain, snow, bugs, and mildew. If you are the type of person who does not like looking at that green hue that is common in pressure treated wood, the good news is that there is a solution for you. Even though it does not really need a lot of extra work, it requires patience as there is a need to wait for some time for the pressure treated wood to be dry enough and clean and ready for painting. The good thing is that pressure-treated wood is paintable, though it should be properly done; otherwise, there is a tendency that the paint will not last long enough. Materials You Will Need Stiff-bristled brush Garden hose Paint sprayer Exterior paint primer Paintbrush (4-inch) Liquid detergent (Mild) Steps 1. Clean the Wood Thoroughly Before starting your painting project on pressure-treated wood, it is very important that it is cleaned accordingly. With this, you can use a brush that is stiff-bristled with soap and water. After given enough attention to the surface as a whole, you can rinse the wood off, allowing it to dry completely. When brushing to scrub the surface clean, make sure to do so in the direction of the wood grain, and not against it. 2. Allow for the Wood to Dry Unsealed, regular wood typically dries in a few days. However, it could take longer with pressure-treated wood, highly depending on the treatment that is applied to the wood. It could range from a few weeks or even months. Painting pressure treated wood before drying will only be a waste of your time since the paint will simply peel away when the moisture starts to push up underneath. In order to check if the wood has already dried completely, you can drip a few drops of water on it. If you notice the water soaking in, it means that the wood has already dried, porous enough to accommodate painting. On the other hand, if the water still stays on the surface in drops, the wood needs to dry some more before starting to paint. 3. Pretreat with Primer Using a primer is very important before painting, particularly since pressure-treated wood is quite picky when it comes to holding on paint. As such, it is important to start with making sure that your primer is designed for exterior use. The label should suggest that it is designed for pressure-treated wood. In the absence of these designations, the primer and the entire painting job may not last long because of the resistance of the wood to liquids. Make sure to coat the wood first with the primer while following the instructions in the label. Keep in mind that when you are applying paint or primer, a thin coat tends to dry faster, turning out more evenly distributed compared with thick coats. 4. Allow the Primer to Dry After the primer is applied, allow for it to dry. This usually takes a day or two, highly depending on the type of primer that you use. Check the label of the primer to know how fast it will dry, but keep in mind that you are dealing with a treated wood that may need more drying time in order to see the best results. 5. Start Painting Now you can finally start painting your pressure-treated wood. To do so, you can apply at least two coats of paint in order to see an even finish. It has been observed that Latex paint is best for pressure tested wood because paints that are oil-based may resist the surface. The right paint job is expected to last for a few years without expecting too much damage. Conclusion Painting pressure treated wood is worth a project! It is also worth mentioning that in exterior applications, when the wood will be exposed to the elements of the environment, paint usually lasts longer on surfaces that are vertical, such as fences, than horizontal ones. Aside from painting pressure treated wood, there are also other treatments that you can use, such as staining pressure-treated wood, which is a good option if you do not like repainting your pressure-treated wood once every 2 or 3 years. Another possible option is allowing the wood to weather and turn into gray, and coating it with sealant for protection. While sealant needs to be reapplied, this could be less of a hassle than actual repainting, which usually involves the need to scrape away some parts of the old painting finish. All in all, painting pressure treated wood will give that look that makes it unique.
15 Sep, 2020
When it comes to exterior and interior painting projects, it is very important to determine the range of temperatures in which you can paint successfully. The reason? If you end up starting your project in temperatures that are outside of this range, there is a possibility that you will risk encountering premature paint failure, along with an unfortunate waste of money and time. What to Consider As a general rule of thumb, it is not advised to apply paint if the temperature is below 50 degrees. Still, there are other factors that need to be taken into consideration. For one, paints, just like other substances, also react to humidity and temperature changes. On top of considering the temperature, which could either be too hot or too cold, the presence of too much moisture will only result in the paint not curing properly. When this happens, you would not want to repaint your house just because things did not go as expected, and you start noticing that the paint prematurely peels since it did not have enough time for curing. The Best Temperature for Painting There is no single answer to this because it still ultimately depends on the actual painting or staining project. For instance, if you are working on latex paint, the recommended temperature is between 50 and 70 degrees Fahrenheit. On the other hand, if you are working on oil-based paint, the generally recommended temperature is between 45 and 90 degrees Fahrenheit. If you need to paint when the temperature is lower than the range mentioned earlier, make sure that you get the specifically formulated latex paint, which is made to endure in temperatures even as low as 36 degrees Fahrenheit or 2.2 degrees Celsius. This type of paint is formulated with coalescing agents that work in bolstering the curing attributes of paint, allowing them to do well even in low temperatures. Other Factors to Consider It is also important to note that since air and surface temperature may vary greatly, there is a need to take things into consideration. For example, other exterior surfaces may take a day, even a two, in order to warm up right after a cold spell. Because certain types of paint require at least a day or some more to cure completely, make sure to check the weather the day after the painting in order to make sure that the temperature will not change too abruptly while the paint is still drying. In order to avoid painting under direct exposure to the sun, as well as on overheated outside surfaces, it has been recommended by some surfaces to follow the shadow of the sun as it goes around the house. Also, it is important to give some time for the paint to completely dry to your touch before sunset, at the start of the cooler temperatures, and when the dew starts to surface. Humidity and Temperature Humidity is the measurement of the water vapor that is present in the air. Too much humidity could result in water vapor formation, especially on the surface that is freshly painted. Aside from the temperature, humidity also needs to be checked. The recommended level of humidity for exterior painting ranges from 40 to 70 percent. Painting amidst an environment with extremely high humidity may only result in some unfortunate occurrences, including leaching. This refers to the presence of brown or white discoloration on the surface of oil-based or latex paints. This will also compromise the protective qualities of paint. Too much humidity in the air will also result in the evaporation of moisture too slowly from the paint solvents, thus leading to a longer time needed for curing, even resulting in a poor finish. When it comes to painting wood surfaces, it is very important to take into consideration the humidity level since wood naturally absorbs moisture coming from the air in the surroundings. This may impede the adhesion of paint onto the surface, thus creating those unsightly bubbles and peeling. One way to avoid excessive humidity in the air is by using a dehumidifier or turning the air conditioner on. Conclusion If you are planning to do interior painting in preparation for the holiday season, or just want to paint your home before selling it, it is important to acknowledge that the winter season is a good time to paint, provided that you are painting within the right temperature range. This could be different when painting outside. In order to make sure that you are doing things right, why not turn to the help of professionals for painting regardless of the weather? This will help you avoid mishaps related to painting. However, if you are only doing a small degree of painting job, considering the tips mentioned above will help you out.
15 Sep, 2020
Before you start painting the interior walls of your homes or do some painting retouch on the doors, woodwork, ceiling, and windows, it is very important to do a quick estimate on the amount of paint that you will buy and use. This process requires the need to do calculations on every surface that you need to paint. The Proper Estimate In order to have a good estimate on how much paint is needed in order to cover the room walls, you may want to add the length of the walls combined, multiplying the sum with the height of the room, measuring from the ceiling to the floor. The number that you will come up with is the square footage of the room. Now that you have the measurement of your room, the next thing that you need to do is to identify how much of the actual square footage surface is considered as paintable. Since you may need to use a different paint on the windows and doors, you can subtract the areas from the total of the room. Then, you can simply deduct 20 square feet for every door, and subtract 15 square feet for every window in a room. The number that you will get will be close to the wall area that needs to be covered with paint. Now here comes the challenging part. The paintable wall area should be divided by 350, which represents the square-foot coverage for every gallon of paint. This is to come up with the number of gallons that you need for your walls. Uneven numbers can be rounded. If the remaining amount is less than 0.5, you may want to get a couple of quarts more of the paint that will go with the gallons. If you notice that the remaining amount is over 0.5, get an extra gallon. Some users recommend buying in bulk, as it is generally more economical. Tips to Apply As a general rule of thumb, there are some tips that you can take into consideration. For one, you can expect to use 1 gallon of paint to be enough for around 350 square feet of the paintable surface. On the other hand, note that if the walls are actually unpainted drywall, you may need more than a gallon to do the job. This is because drywall absorbs more paint and thus consumes more paint as expected. Another thing that you need to take into consideration is the number of coats that you would like to apply. If you are painting walls that are not yet finished, dark in color, or heavily patched, it may be best to apply two coats of a coat. Another thing to note is that when you are painting a dark color, experts add color tint on top of the white primer. The tints for both alkyd and latex paints are usually available at local paint stores; in order to expect the best results, select a shade of tint that is nearest to the color of the topcoat. Factors to Consider There are some factors that you want to take into consideration when getting the estimate of how much paint to buy: Ceiling Paint If you need to paint the ceiling of a room, including the walls, you may want to use a paint calculator, which calculates the ceiling paint as separate from the other parts of a paintable space. Doors and Windows It is better to use a paint calculator for this and get a good estimate for the paint to buy. When using a paint calculator, you can simply input the number of doors and windows in a room that you want to paint. The calculator will then do the job of counting and coming up with a measurement based on the square footage of the paintable area. Number of Coats The safest number of paint coats is two. Still, if you want to achieve a certain color or texture, then you may need to add more paints to accommodate the number of paints that you want to use in your painting. Conclusion Repainting your home is surely an exciting activity which can be enjoyed by the entire family. However, not knowing how to get an estimate will only mean either a lack of paint or an over the purchase. With the prices of paint also continuing to go up just like other commodities, it is very important to ensure that you only purchase the right amount of paint. With this in mind, it is very important to know the paintable surface area of any location in your room, whether it is for the ceiling, doors, windows, and others. Doing so will ensure that you will not spend too much your hard-earned money over something that you will not need.
Share by: